Monday, 7 May 2012

Turning a "munny" into a USB cable extension socket - Part 2

Painting the finished model
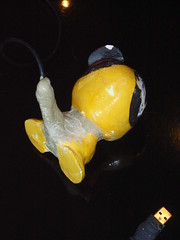
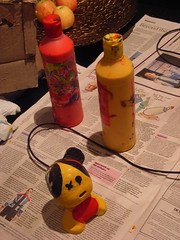
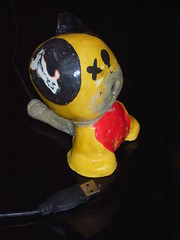
This little beauty is a pimped version of an air-drying clay model munny my daughter made, but discarded.


It has been operated on, to insert a USB extension lead, so that when I get things off a USB memory stick into the computer, I can use this instead of finding the USB port on the PC - Much more enjoyable!
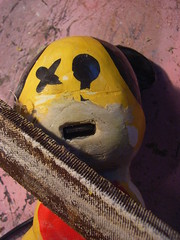
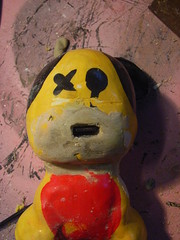


Pimping a ceramic munnyPimping a ceramic munny The USB socket was stuck in the mouth, threaded through a hole throught the body (see previous post).

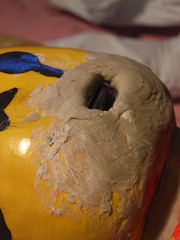
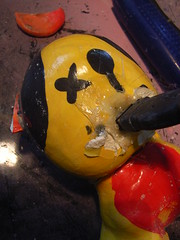
Having been repaired with builder's grab adhesive, the mough was filed and sanded to restore the original shape of the head.
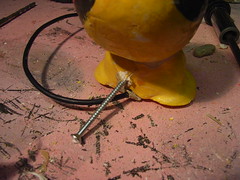


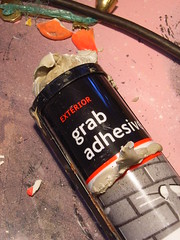
Pimping a ceramic munny Grab adhesive
The original model had slumped during drying, and was not stable.

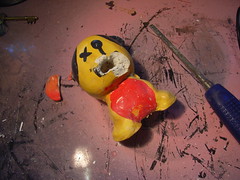
It's centre of gravity was too far back, making it fall over backwards easily. To make it stable, a tail was built. A splint was added by screwing a galvanised wood screw into the model
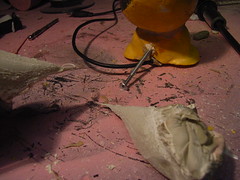


Pimping a ceramic munny
More grab adhesive was packed round the screw and a tail modelled up around it
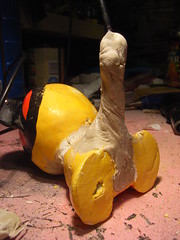
Pimping a ceramic munny


Pimping a ceramic munny

This was left to dry hard. This took about a week. The surface dries in a day, and although it can then be painted, the underlying adhesive is still plastic. This means it can easily be distorted during handling.

Once dry, it was filed and sanded as the mouth had been above.

Note, the model's right ear (on the left looking at it) had been damaged beyond repair and was deliberately left as a scar.
Painting the finished model

Painting the finished model
Once sanded, it was then wiped down to remove filing dust, then repainted back to its original scheme.  (left)

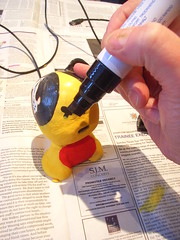
The black details were then reapplied using permanent marker pen (right)


Wednesday, 2 May 2012

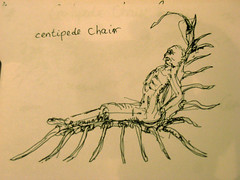
Centipede chair design

Sketch for centipede chaise longue
Things I'd like to build one day volume 201522...

Although I'm not sure if I'll ever build this, I have had a design for a rather OTT chaise longue in my head for some years now. 

Essentially an excuse to build a more interesting recliner than your average chaise longue.

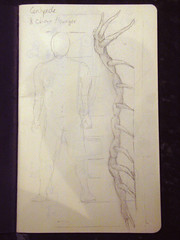
The basic concept is a jointed segmented chair body, with firm padded segments hinged together with free rotation along one axis allowing up/down hinging. 

This would then be dynamically held in position by some mechanism to apply a curling tension that tends to make the chair coil up if empty.  When sat on, the weight of gravity on the sitter would counter-balance this to provide a slightly sprung effect.

Sketch for centipede chaise longue 
I have not thought through the exact way the tensioning would be applied . It would need to be adjustable to allow for different people's weights. It may also be necessary to have different  tensioning at different points. For example the lower half (seat area) may need to be under less tension that the area where the support for the lumbar region of the back is, etc.

This would need prototyping!!

I would also want some spring in the legs for dampening to provide a more comfortable seating experience.

As for materials - I rather fancy dark reddy-brown, antiqued and polished leather for the pads on the segments, with some sort of dark metal or possibly kevlar legs.  An aluminium/bronze type alloy perhaps?

Maybe one day!

Tuesday, 1 May 2012

Turning a "munny" into a USB cable extension socket

Hacking model into USB extension socketGrab adhesiveThis is a hack job on one of my daughter's models. She has rejected it, but it's too lovely to discard, so here it is half way through being turned into a USB extension lead socket - an unnecessarily OTT socket maybe, but certainly more fun than a dull black plastic housing...

The mouth has been built up using grab adhesive, widely used in building to attach cladding, etc.. This is a surprisingly good modelling material: workable, but fast drying and hard when set

Hacking model into USB extension socket

Working backwards here, before the final mouth remodelling above, the USB socket had to be fitted to the existing model.


This is a normal extension lead, placed into a cavity hacked out of the mouth, then glued in place with hot glue


Hacking model into USB extension socket


The hack job to put the hole in the face is on the left.

the feed hole to get the cable in from below is on the right


here's the cable and original model before surgery!!
Hacking model into USB extension socket