This majestic structure is our new greenhouse. It is an irregular hexagon in plan. I love it.

The leaded lights are from the original door and side windows of our house, from c.1915. We had to remove them as they were no longer secure. It was great to see them back in a new life. I wanted it green, like the colour of old village cricket pavillions, which were always British Racing Green.
Here it is, showing off the new path spur that curves round to it (and a great brooding sky!).


The above shots were taken before it was finished. This was before the final touches were added.
I am especially pleased with its finial. This was inspired by all the spires round Reading. It has a classy brass ball atop.


Interior
In contrast to the lovely green exterior, I painted the interior white with emulsion for brightness. It reflects and diffuses the sunlight round the interior. This is the rear wall.


The staging shelves are made from pallets.

There is 240V mains for charging your phone etc. (in this shot, a bluetooth speaker!)


Design
The design for this needed to mirror the 135 degree angles in the rest of the garden, not least because it created a diagonal frontage that both looked good, but also faced right into the morning sun.
The design is an irregular hexagon in plan. To get my head round how to build this, I made a model out of good old skewers and tape.

All the glass was to be sourced from reclaimed double glazed window units that conveniently appear in skips all the time for free. They are square. The roof design included triangles. For those, I used acrylic. Some was left over from a Natural History Museum Whales exhibition. The remaining odd pieces I cut from a bought sheet.

Groundwork
After extracting the design from my brain into a model, I then started building it for real at full scale. This started with the base frame. You can see the irregular hexagon shape of the footprint of the building. This is to allow the rear wall to fit tightly parallel to the border fence and the front rail is at a 135 degree angle to face diagonally into the garden.
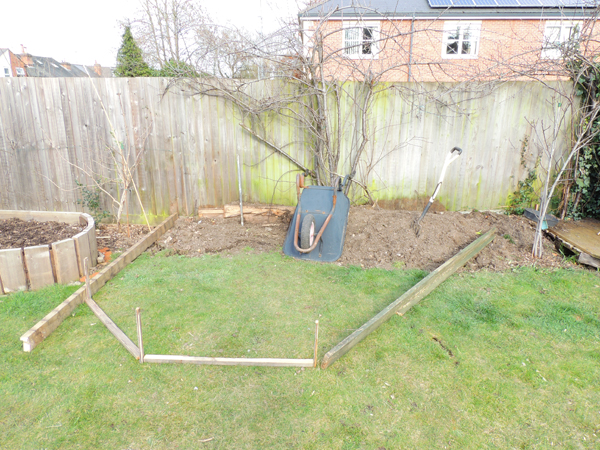


Lumps of turf drying


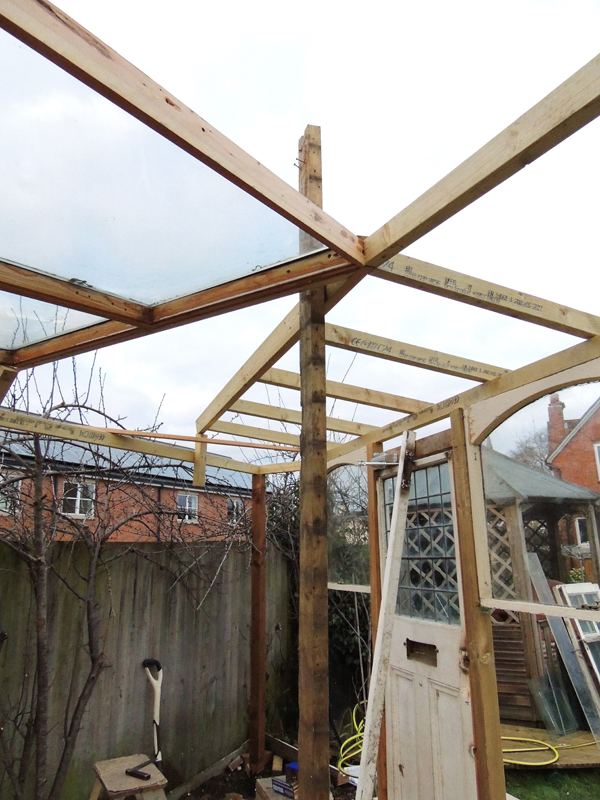
Carcassing
The structure is supported by six uprights at each corner. These are 70mm square fence posts, secured using fence post metal spikes.

The front windows with rounded tops are sash windows from a victorian house round the corner in Hamilton Road, that was throwing them out


Initially, I had to use a central prop to stop the frame collapsing (mainly when I was standing on the top of it).
The large window on the left, behind the ladder is a single glass panel 1400mm x 1000mm This was a great find. It is an office glass table top. It is about 10mm thick!

Moving round to work on the roof...

On the right in thi spic, you can see some of the scrounged windows used.

Each double glazed unit yields two panes. I cut the round the plastic bezel that holds them together. This is handy, because you get two identical panes from each unit.


Creating the asymetrical roof ridge
I particularly like the pattern of the irregularly angled roof . Once I had enough rafters I created a central apex. This is jointed together with very big screws that act as pin joints. The rafters are set at a low angle (about 15-20 degrees). Because they meet in one joint, they support each other and spread the weight out to rails at the top of the wall frame and this is in turn supported by the six corner posts.

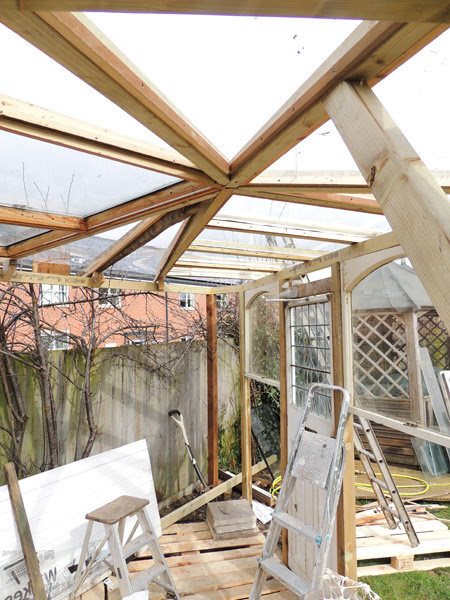
Here is a view from up a ladder, installing window panes. These ones are Velux skylights from a skip. You can see here that the floor is made of pallets. They are in their raw state here. I filled in the slatted holes later to make a solid floor.


 |
This was an epic build that took all of April. It was worth it. It is a lovely space to potter in o rjust read in the evening light, because it stays warm until quite late.


