Sunday, 2 July 2023

More interesting natury things

Some carnage in the flora...

I like hover flies. They are cute and pollinate flowers. However, this can be hazardous...

This is maybe a Dasysyrphus (or Epostrophe) Somethingorothery. 

Whatever it is, it didn't see  Misumena Vatia coming...


Nice rose though.

And for some light relief after that traumatic scene, here are some pretty insects also on flowers, but not dying.

Some unknown flower beetle...


The daisy is pretty too...


And another hover fly. This one was on one of our clematis flowers.


Talking of predators though, look at this beauty - the first Devil's Coach Horse I've seen close-up in decades (or at least that I can recall!). When I was a child, we would show one of these a stalk of grass and it would attack it, impressively. Only about 35mm long, but totally bossing it here...


Another epic beetle. Not quite as scary as the above, but also not to be messed with. A female stag...


Stag beetles are pretty ponderous on land. This fat 18" carp is even more languorous in the algae-clogged end of the lake...


This toad was also taking it easy when I was digging up woodchippings with a pick ake. It somehow evaded a very sticky end, by just walking out of the mess and then ambling off under some leaves...


Finally, something I haven't seen before - a bumblebee partaking of aphid honeydew. This is honeydew from whitefly aphids on the leaves of our damson trees. The bee wouldn't keep still so the shot is rather blurry, but you can see its proboscis lapping it up, literally.


Here are the producing aphids. I spliced two pics together to show them and their excreta.


Thursday, 27 April 2023

Bin shelter door

This one is about gate-building

But first, here is a new extension of the fence I made

Very neat. However it's not a fence. It's a place for popping the wheelie bins, so they don't have to sit on the lawn looking ugly and getting in the way of the car etc 

Here it is from the front...
 

The outer fence is actually a door


Within which the bins are all cosied up.


I had to build the door from scratch as it needed to be an unusual shape. Here it is before cladding.


It has a door closer, so it stays shut and doesn't bang about when it is windy. 


I enjoyed making this - it is a proper jointed door frame.

I made it all made from 4" x 2" rough timber scrounged from skips

It has some hefty mortices...


And tenons...


These were cut with a mixture of:
  • power saws and hand saws (tenons)
  • auger bits in a power drill and chisels (mortices)
  • filing sander (cleaning joints up)


Construction

I've missed out most of the useful stuff about cutting the tenons etc (oops), but suffice to say, you need to mark them consistently with the square and the marking gauge. When using the marking gauge the two pins should be applied from the same edge on the face of both mortice and tenon that will eventually face together when joined.   

Once all cut, it is worth testing them by a dry-run on construction.

You need to do this to test the joints fit and then trim if needed...


And to see if all bars fan out in a flat plane as intended...


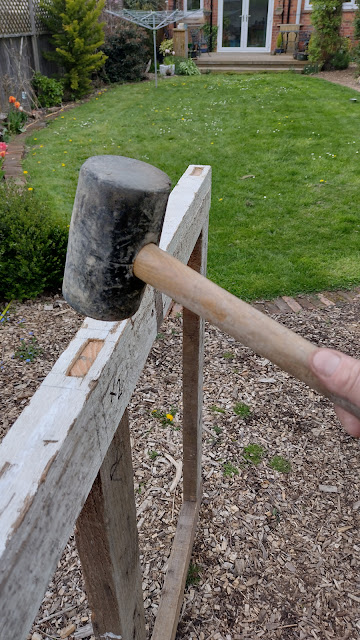
The joints should be quite snug when dry fitted. E.g. here, I had to use a mallet to get them totally closed. The frame should be pretty stable without glue.


Nice...


For wood joinery, you should always apply glue to both pieces being joined, so both pieces are in full contact with glue, which then closes any gaps between the snug pieces forming a fully solid joint. This includes the shoulders

Your mortice should be good and sloppy...


And your tenon slathered...


With the glue, they should ease together more easily than when dry fitting.


Halfway through connecting the crossbars to one rail...


Putting the second rail in place....


After fitting, I used sash clamps to pull the joints firmly together and keep them there while the glue set.


The corners were pleasingly square without needing any tweaking.


When in the garden fitting the gate, it is best to have a guard dog on hand.


Tuesday, 4 April 2023

Glazing the pizza oven dome

After toiling at building the pizza oven, 'twas decreed it needed to look a bit swisher...

And so, and after a while of deliberation, a gloss-black crazy glazing was decided...

Looking good...

Front on...

Lovely in the early spring, with the cherry blosson...


The crazed tiling was done using cheapish Wickes bathroom/kitchen tiles -
Cosmopolitan Black, no less! 


Too rectangular, so, with a hammer , I did go (to the back of the tiles obvs, not the fromt)


To fix them, I mixed a pretty runny mortar mix - about 5-1 cement-builder's sand. 


The application was using my fingers to slop a blob of mortar onto the dome shell, Then push the tiling pieces into it


You get the gist


Some hours later...

It's worth cleaning off odd stray cement blobs - they dry before you know it...


And clean off excess mortar as you go...


Another angle. This is not yet cleaned...


I also painted the wooden door frontage black to match - this is fireproof paint for wood burners...

Overall, a good job - like a big black beetle shaped mirrorball.

Happy with this.


Friday, 24 March 2023

More experiments in wood-fired cooking

 Some more ponderings on how to cook in the wood-fired oven.

First things first. I'm so glad I invested in serious insulation in the oven dome. It really is incredibly efficient to cook, when the heat doesn't escape. A small wood pile will get the oven hot enough to flash cook a pizza or two, then slow cook a whole joint overnight from the trapped heat slowly cooling.

Here you can see that not very much wood has got the oven up to 300+C.
This is easily sufficient to cook a pizza in 5-10 minutes.


Cooking pizza seems to work best with the door open - the airflow gets the wood firing up. The parabolic form of the inner oven surface radiates the stored heat down onto the pizzas in parallel (well, more or less).

The oven cools down a bit when the door is open.

But that's OK - after cooking anything that need high heat - you can just pop a pork joint or some beef ribs in at bedtime and it will perfectly slow-cook, over 7 or 8 hours, while you slumber.

For example on such a night, this is the ambient oven temperature late at night - about 190C


In you go brisket joint, in stock with veg...


At 7am the next morning, the temperature had, very gradually, slowed to about 80C


And the meat internally has cooled to 56C after hours of slow cooking


After this sort of prolonged low heat cooking, the meat just falls apart ...
  

Some more examples

Short rib, before cooking - sitting in well seasoned stock...

Later on (like 8 hours of cooking), slavered in a sauce based on the remainder of the sauce


Fall-apart delicious...


A brisket joint after overnight cooking...


turned over with juice topped up a bit


Morning temperature after 8 or 9 hours cooking


More short ribs after a night of slow-cooking..


Ribs are super-tough unless you slow cook them. Then they are divine...


A pork shoulder joint, marinated for a couple of hours...


And after overnight cooking...


A different pork joint, deconstructed easily with forks...


and so on, and so on...