Here's how I made this work on this dummy - it's essentially a mouth hole with a fixed upper lip and a hinged lower lip. There's an operating lever attached to the lower lip
Here it is in action...
Cutting out the mouth opening
The dummy head was originally carved as a solid head from wood with the mouth carved into the solid wood of the face.To make the dummy head animatable, the removable face of the dummy needed a mechanism to be attached inside it, but before that could be done, the solid mouth needed to be cut out to produce a mouth hole.
This was done crudely with a saw attachment on a multi-tool.
The multi-tool saw gives a pretty accurate cut for the basic mouth hole. I then needed to emlarge the hole to fit the moving lower lip. Because this lip would be hinged, the lower half of the hole needed straight edges to allow free rotation.
I enlarge the hole with a tungsten carbide cutter burr in the die grinder
Until it was gaping nice and vacuously.
Creating the moving lower lip
There is no jaw movement at the chin for the mouth. The face has a fixed upper lip and the lower lip is separate and hinged.This was carved by eye from an oak offcut. Here it is being sized after some initial rough carving.
After some more shaping with the grinder and sanders it started to look like this...
Adding the hinge
The lip was quite simply attached using a light hinge I had amongst my various miscellaneous hinges I keep for such an eventuality. This hinge is a flush hinge that is normally used for box making. In this case, it had the advantage that the wider fixing could be attached to the mask back, with the smaller tongue fixing sticking out. These made it perfect it to attach the lip to.
To fit the lip onto the hinge, a simple groove was cut into the back of it with the very small multi-tool plunge-cutting saw blade.
It could be eased onto the smaller protruding hinge plate, thus...
Here it is seen from the back.
Fine tuning the fit
Once the lip was fitted to the hinge, it needed a little more carving/shaping to get the fit nice round all the edges. This is easier if done with the grinder held in the vice
But, I realised that the first go at carving the shape by hand had misjudged the size of the back of the lip. To make this better, I use my old friend Plasticine. Here's the original lip and a roll of it.
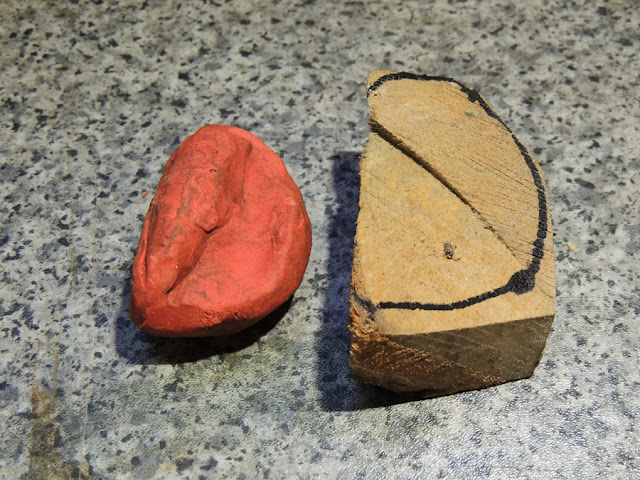
I judged the required shape by shoving a blob of Plasticine into the mouth and shaping it a bit with sculpting tools and fingers...
Then removed the moulding this made and used it as a guide to carve a new lower lip.
To start I just drew round it.
And then cut this out as a block.
And then shaped it down with the filing sander locked in the vice.
Until I had created a rough wooden version.
After here it is after some more fine sanding...
As well as the main cut for the hinge plunge saw, I used a drill bit in the Dremel to cut an extra narrower slot for the control lever.
Here it is fitted to the face mechanism, as seen from the back...


This is absolutely amazing!
ReplyDelete